Rooting a 5G speaker I got for £1
⚠️ Disclaimer: This entire article is written for educational purposes only, rooting your device will void its warranty. I am not responsible if you bootloop (get it?) your device!
The LoopDL is a £1 £95 speaker/android phone (?) which runs a MediaTek MT6877V SoC. The device runs a very stock Android
OS with MediaTek drivers added in alongside the custom Loop apps (see further down).
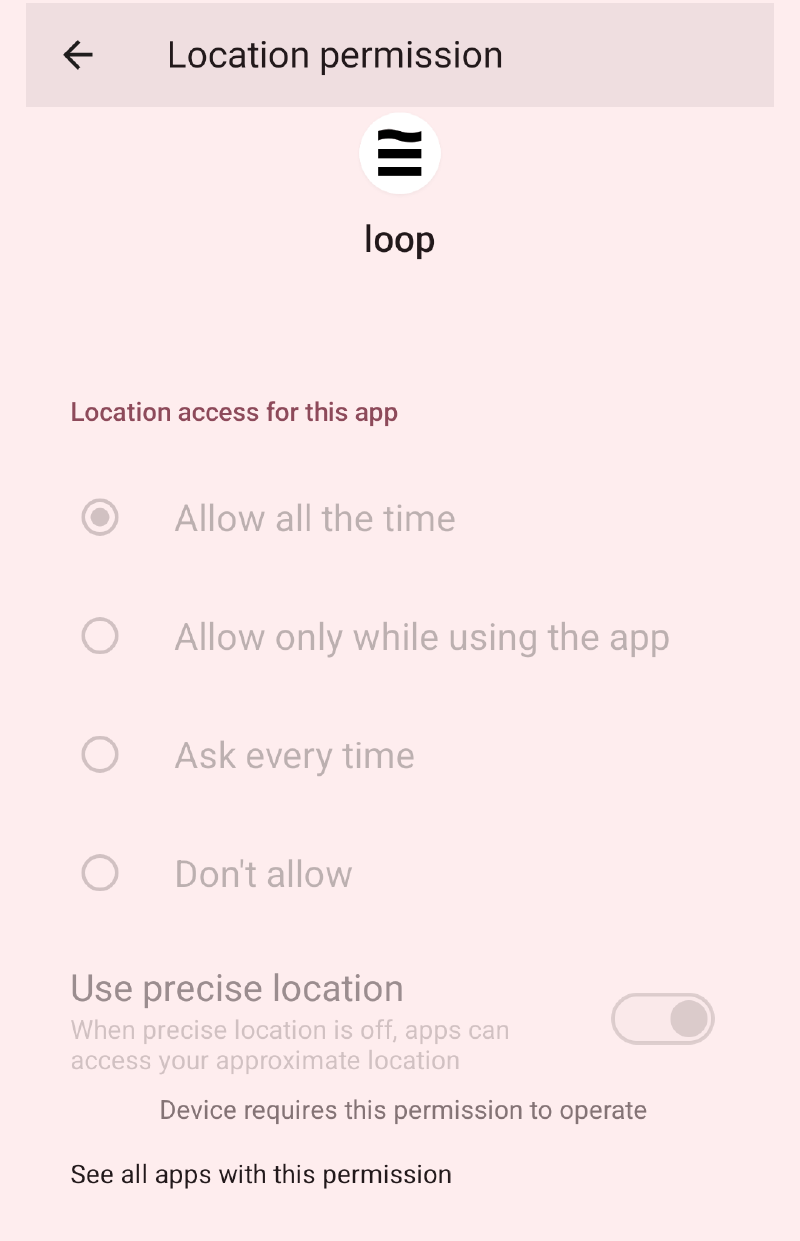
If you have purchased this device, I feel it is important for you to be aware of the potential privacy implications. The Loop app has access to the camera, microphone, nearby devices and location (all the time), you cannot change these settings or disable the app without root. The device seems to re-activate location services within a few minutes of them being disabled (this stops happening when the Loop app is disabled). I am not saying it is spying on anyone, to me, it just seems like an overly permissive set of app permissions for an app which is used to: active the device, enable a Wi-Fi hotspot and change the music equaliser settings.
Rooting Introduction#
The LoopDL does not have any publicly downloadable OTA images, so the rooting process requires a few more steps than your traditional Android handset. We will need to extract the boot partition files to create a boot image that magisk can patch. Luckily the device is bootloader unlocked and has DSU support which makes rooting possible.
It’s important to note that this device has two fastboot modes: fastboot and fastbootd. You will know you are in fastbootd as the screen will show “fastbootd” in red at the top, whereas fastboot mode only has the backlight enabled.
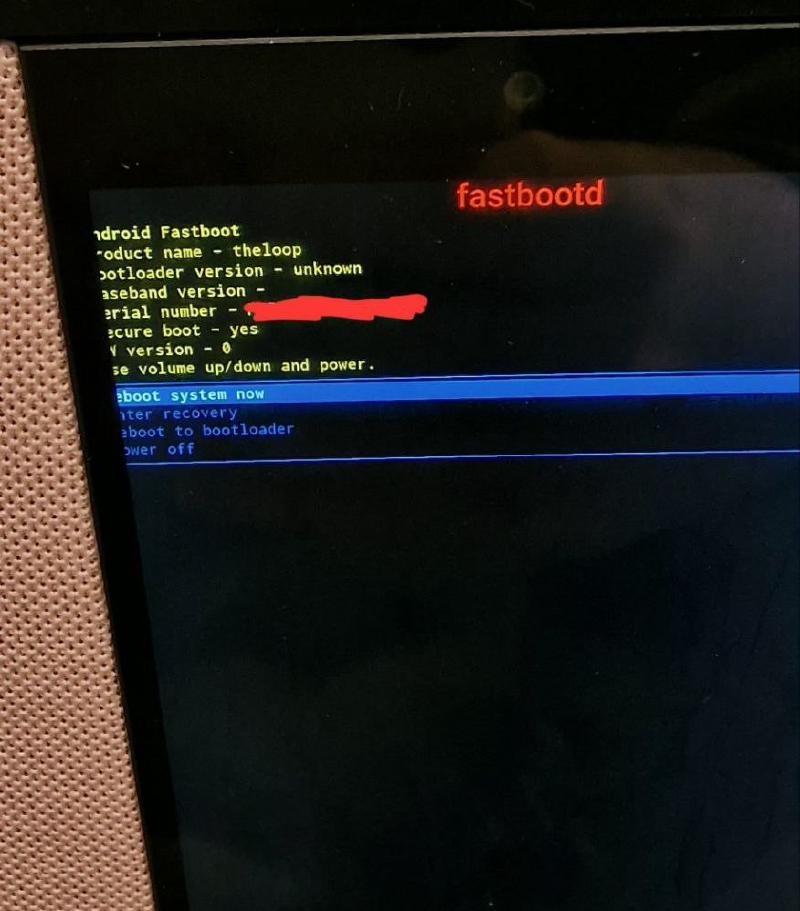
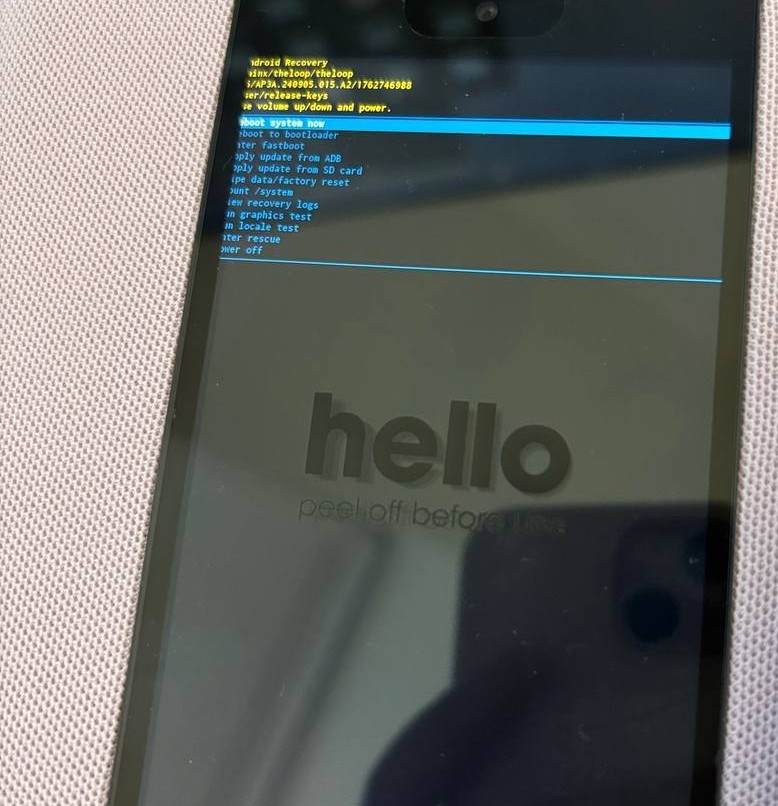
Several people I know have had issues running certain fastboot commands in fastbootd mode, so try switching between them if you are having issues. If you find yourself in recovery mode or similar, you can use the volume buttons to navigate yourself out.
Rooting Process#
Useful links:
Source for GSI boot image extraction steps: https://gist.github.com/gitclone-url/a1f693b64d8f8701ec24477a2ccaab87
DSU-Sideloader: https://github.com/VegaBobo/DSU-Sideloader
GSI Images: https://github.com/TrebleDroid/treble_experimentations/releases
Magisk Releases: https://github.com/topjohnwu/Magisk/releases
# Reboot device to bootloader
adb reboot bootloader

# Check that device is showing up in fastboot list
fastboot devices

# Unlock bootloader (will factory reset device)
fastboot oem unlock
fastboot reboot
Setup the loop offline when prompted (its quicker).
Enable developer options in settings (tapping by tapping the build number over 9000 times).
Install DSU-Sideloader and download a GSI image with root access.
Since the loop comes with Android 15, I used the system-td-arm64-ab-vanilla.img.xz image to reduce the chance something would go wrong.
If you choose to download the image on your computer, use adb push system-td-arm64-ab-vanilla.img.xz /sdcard/Documents/ to push the image to the loop.
Set the userdata to be 3GB and follow the DSU sideloader instructions, eventually a notification telling you that you can reboot the device will appear.
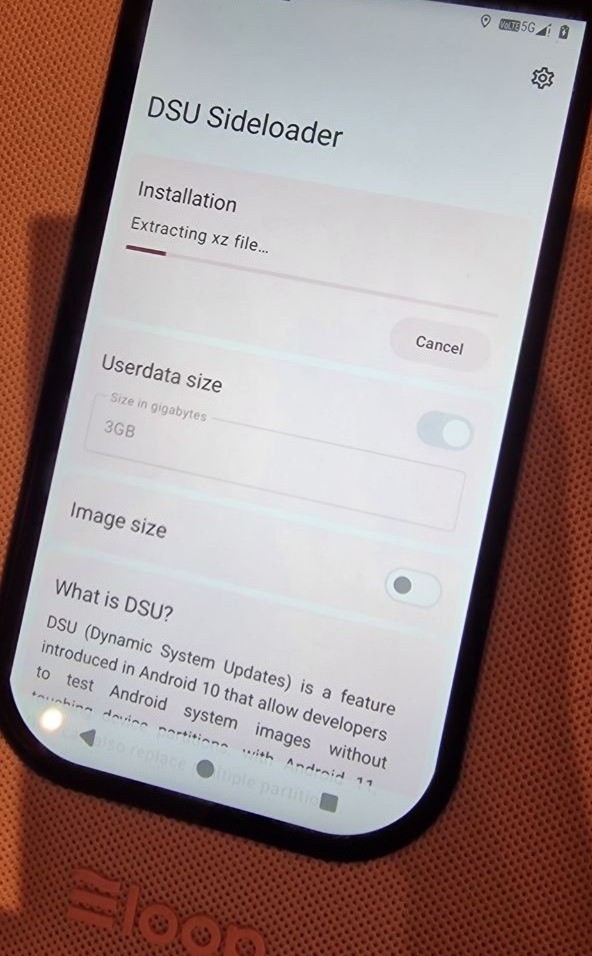
Once rebooted into the GSI image, you will have root shell access, meaning that we can now create a boot image.
Pull the following partitions via adb shell:
su
mkdir -p /sdcard/img/
for PARTITION in "init_boot_a" "init_boot_b" "boot_a" "boot_b" "vendor_boot_a" "vendor_boot_b"; do
  BLOCK=$(find /dev/block \( -type b -o -type c -o -type l \) -iname "$PARTITION" -print -quit 2>/dev/null)
  if [ -n "$BLOCK" ]; then
    echo "$PARTITION" = $(readlink -f "$BLOCK")
	dd if="$BLOCK" of="/sdcard/img/$PARTITION.img"
  fi
done
Take note of the current active slot (this will be the one you need to patch): getprop ro.boot.slot_suffix
Install the Magisk APK that you downloaded from GitHub: adb install Magisk-v30.6.apk
Patch the init_boot_b (or whichever is your active slot) using Magisk.
If you can’t find the img folder, check the commands ran correctly earlier
Pull the image via adb: adb pull /sdcard/Download/magisk_patched-30600_XXXXX.img
You should also back up the boot partition files we created in the event something goes wrong: adb pull /sdcard/img/
Now you can reboot out of GSI mode (back to the LoopDL Android distribution).
Then you can reboot to fastboot mode and flash the new init_boot image you just created.
fastboot flash init_boot_b magisk_patched-30600_XXXXX.img
fastboot reboot
Now you should have root! (once Magisk has completed the setup)
And finally, we can run NSG, on our 5G speaker - as God intended.
Digging deeper…#
NSG’s band-locking menu shows the device is only capable of 4G on bands 1, 3, 8, 28, 38, 40 and 41. As well as 5G on n1, n3, n8, n28, n38, n40, n41, n77 and n78. The device doesn’t seem to have 2G or 3G available (need to do more digging).
Since we now have root, we can also access privileged activities in the MediaTek apps, such as the “Band Mode” activity which allows for band locking.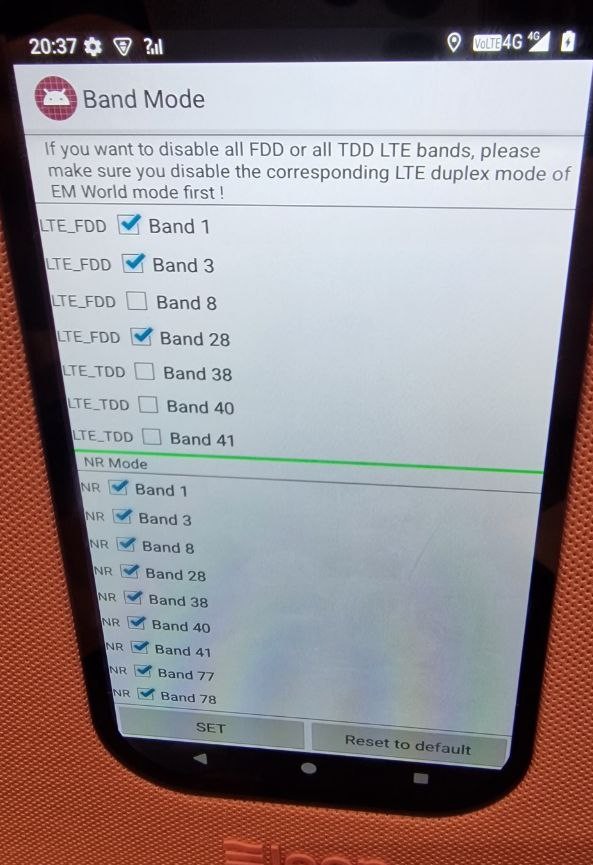
Pulling the CA combinations from the UE capability response, we can see it’s pretty lacklustre:
- https://uecapability.smartphonecombo.it/view/multi/?id=a2452d9e-420f-4993-a033-bba13f931578
- https://uecapability.smartphonecombo.it/view/multi/?id=0f069583-473e-48a2-97b7-1f2038547844
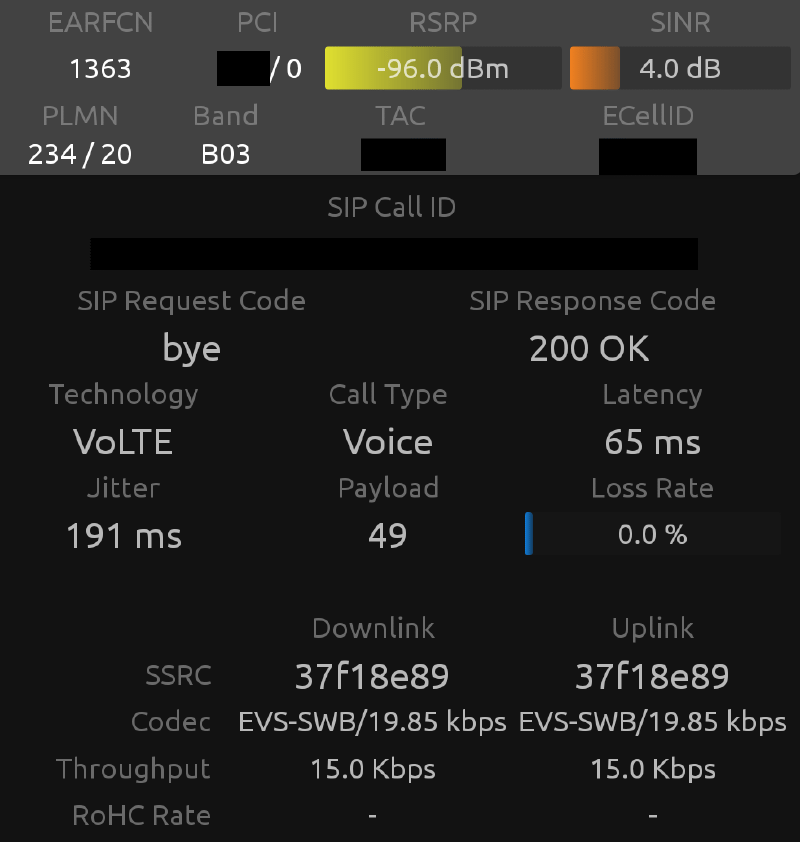
The Loop supports EVS calls, albeit at a weird bit-rate of 19.85Kbps which I’ve not previously seen, but is in the 3gpp spec (TS 126 441 v12.0.0).
Pre-installed Apps#
What does this thing have pre-installed on it?
theloop:/ # pm list packages | grep -Ev 'android|google|mediatek'
package:co.rainx.loop.setup
package:co.rainx.loop.launcher
package:com.weibu.factorytest
package:com.debug.loggerui
package:vendor.rainx.setupwizard.overlay
package:com.pri.autotest
package:com.trustonic.teeservice
The three apps of interest are: co.rainx.loop.launcher, co.rainx.loop.setup and vendor.rainx.setupwizard.overlay.
I disabled them using the package manager, as I don’t want this thing phoning home. I also don’t like how the app has camera and microphone permission but that’s a separate issue.
pm disable co.rainx.loop.launcher
pm disable co.rainx.loop.setup
pm disable vendor.rainx.setupwizard.overlay
The APKs for these apps can be easily backed up using:
pm path $PACKAGE_ID
and then using adb pull to fetch the path that is returned.
5G eSIMs#
The Loop has 2 eSIMs, one seems to be for bootstrapping during setup, then once you activate the product that eSIM is disabled and a new Gamma Communications eSIM is activated on the device.
This Gamma SIM uses Three UK (PLMN 23420) and doesn’t seem to allow roaming onto any other network.
£25/mo for unlimited data on Three is not a good deal, but I suppose they have to make a bit of money back on the units some how. The razer and blades business model comes to mind here.
Credits#
Thank you to Eva for sharing some images of her loop’s recovery screen :)
There are no articles to list here yet.